2.6 Autograd
了解计算图后,我们可以开始学习autograd。这里再次回顾pytorch官网的一张示意图
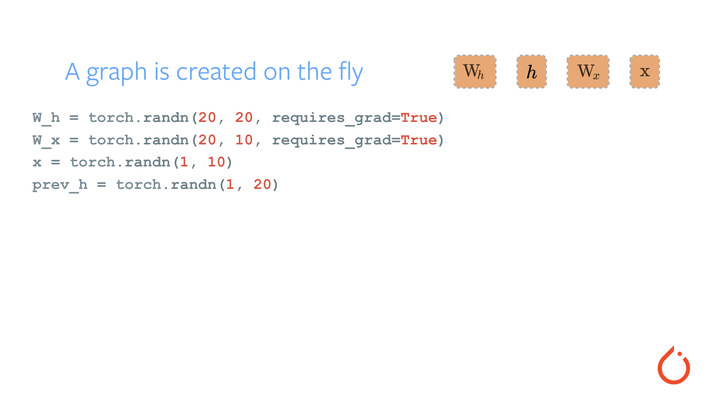
在进行h2h、i2h、next_h、loss的计算过程中,逐步搭建计算图,同时针对每一个变量(tensor)都存储计算梯度所必备的grad_fn,便于自动求导系统使用。当计算到根节点后,在根节点调用.backward()函数,即可自动反向传播计算计算图中所有节点的梯度。这就是pytorch自动求导机制,其中涉及张量类、计算图、grad_fn、链式求导法则等基础概念,大家可以自行补充学习。
autograd 官方定义
来看看官方文档中对autograd的解释:
Conceptually, autograd keeps a record of data (tensors) and all executed operations (along with the resulting new tensors) in a directed acyclic graph (DAG) consisting of Function objects. In this DAG, leaves are the input tensors, roots are the output tensors. By tracing this graph from roots to leaves, you can automatically compute the gradients using the chain rule.
In a forward pass, autograd does two things simultaneously:
- run the requested operation to compute a resulting tensor
- maintain the operation’s gradient function in the DAG.
The backward pass kicks off when .backward() is called on the DAG root. autograd then:
- computes the gradients from each .grad_fn,
- accumulates them in the respective tensor’s .grad attribute
- using the chain rule, propagates all the way to the leaf tensors.
from: https://pytorch.org/tutorials/beginner/basics/autogradqs_tutorial.html#more-on-computational-graphs
划重点:
- 自动求导机制通过有向无环图(directed acyclic graph ,DAG)实现
- 在DAG中,记录数据(对应tensor.data)以及操作(对应tensor.grad_fn)
- 操作在pytorch中统称为Function,如加法、减法、乘法、ReLU、conv、Pooling等,统统是Function
autograd 的使用
autograd的使用有很多方法,这里重点讲解一下三个,并在最后汇总一些知识点。更多API推荐阅读官方文档
- torch.autograd.backward
- torch.autograd.grad
- torch.autograd.Function
torch.autograd.backward
backward函数是使用频率最高的自动求导函数,没有之一。99%的训练代码中都会用它进行梯度求导,然后更新权重。
使用方法可以参考第二章第二节-新冠肺炎分类的代码,loss.backward()就可以完成计算图中所有张量的梯度求解。
虽然绝大多数都是直接使用,但是backward()里边还有一些高级参数,值得了解。
torch.autograd.backward(tensors, grad_tensors=None, retain_graph=None, create_graph=False, grad_variables=None, inputs=None)
- tensors (Sequence[Tensor] or Tensor) – 用于求导的张量。如上例的loss。
- grad_tensors (Sequence[Tensor or None] or Tensor, optional) – 雅克比向量积中使用,详细作用请看代码演示。
- retain_graph (bool, optional) – 是否需要保留计算图。pytorch的机制是在方向传播结束时,计算图释放以节省内存。大家可以尝试连续使用loss.backward(),就会报错。如果需要多次求导,则在执行backward()时,retain_graph=True。
- create_graph (bool, optional) – 是否创建计算图,用于高阶求导。
- inputs (Sequence[Tensor] or Tensor, optional) – Inputs w.r.t. which the gradient be will accumulated into .grad. All other Tensors will be ignored. If not provided, the gradient is accumulated into all the leaf Tensors that were used to compute the attr::tensors.
补充说明:我们使用时候都是在张量上直接调用.backward()函数,但这里却是torch.autograd.backward,为什么不一样呢? 其实Tensor.backward()接口内部调用了autograd.backward。
请看使用示例
retain_grad参数使用
对比两个代码段,仔细阅读pytorch报错信息。
#####  retain_graph=True
import torch
w = torch.tensor([1.], requires_grad=True)
x = torch.tensor([2.], requires_grad=True)

a = torch.add(w, x)
b = torch.add(w, 1)
y = torch.mul(a, b)

y.backward(retain_graph=True)
print(w.grad)
y.backward()
print(w.grad)
tensor([5.])
tensor([10.])
运行上面代码段可以看到是正常的,下面这个代码段就会报错,报错信息提示非常明确:Trying to backward through the graph a second time。并且还给出了解决方法: Specify retain_graph=True if you need to backward through the graph a second time 。
这也是pytorch代码写得好的地方,出现错误不要慌,仔细看看报错信息,里边可能会有解决问题的方法。
#####  retain_graph=False
import torch
w = torch.tensor([1.], requires_grad=True)
x = torch.tensor([2.], requires_grad=True)

a = torch.add(w, x)
b = torch.add(w, 1)
y = torch.mul(a, b)

y.backward()
print(w.grad)
y.backward()
print(w.grad)
tensor([5.])

---------------------------------------------------------------------------

RuntimeError                              Traceback (most recent call last)

<ipython-input-9-64bccc64184d> in <module>
     10 y.backward()
     11 print(w.grad)
---> 12 y.backward()
     13 print(w.grad)


D:\Anaconda_data\envs\pytorch_1.10_gpu\lib\site-packages\torch\_tensor.py in backward(self, gradient, retain_graph, create_graph, inputs)
    305                 create_graph=create_graph,
    306                 inputs=inputs)
--> 307         torch.autograd.backward(self, gradient, retain_graph, create_graph, inputs=inputs)
    308
    309     def register_hook(self, hook):


D:\Anaconda_data\envs\pytorch_1.10_gpu\lib\site-packages\torch\autograd\__init__.py in backward(tensors, grad_tensors, retain_graph, create_graph, grad_variables, inputs)
    154     Variable._execution_engine.run_backward(
    155         tensors, grad_tensors_, retain_graph, create_graph, inputs,
--> 156         allow_unreachable=True, accumulate_grad=True)  # allow_unreachable flag
    157
    158


RuntimeError: Trying to backward through the graph a second time (or directly access saved tensors after they have already been freed). Saved intermediate values of the graph are freed when you call .backward() or autograd.grad(). Specify retain_graph=True if you need to backward through the graph a second time or if you need to access saved tensors after calling backward.
grad_tensors使用
w = torch.tensor([1.], requires_grad=True)
x = torch.tensor([2.], requires_grad=True)

a = torch.add(w, x)
b = torch.add(w, 1)

y0 = torch.mul(a, b)    # y0 = (x+w) * (w+1)    dy0/dw = 2w + x + 1
y1 = torch.add(a, b)    # y1 = (x+w) + (w+1)    dy1/dw = 2

loss = torch.cat([y0, y1], dim=0)       # [y0, y1]

grad_tensors = torch.tensor([1., 2.])

loss.backward(gradient=grad_tensors)    # Tensor.backward中的 gradient 传入 torch.autograd.backward()中的grad_tensors

# w =  1* (dy0/dw)  +   2*(dy1/dw)
# w =  1* (2w + x + 1)  +   2*(w)
# w =  1* (5)  +   2*(2)
# w =  9

print(w.grad)
tensor([9.])
torch.autograd.grad
torch.autograd.grad(outputs, inputs, grad_outputs=None, retain_graph=None, create_graph=False, only_inputs=True, allow_unused=False)
功能:计算outputs对inputs的导数
主要参数:
- outputs (sequence of Tensor) – 用于求导的张量,如loss
- inputs (sequence of Tensor) – 所要计算导数的张量
- grad_outputs (sequence of Tensor) – 雅克比向量积中使用。
retain_graph (bool, optional) – 是否需要保留计算图。pytorch的机制是在方向传播结束时,计算图释放以节省内存。大家可以尝试连续使用loss.backward(),就会报错。如果需要多次求导,则在执行backward()时,retain_graph=True。
create_graph (bool, optional) – 是否创建计算图,用于高阶求导。
allow_unused (bool, optional) – 是否需要指示,计算梯度时未使用的张量是错误的。
此函数使用上比较简单,请看案例:
import torch
x = torch.tensor([3.], requires_grad=True)
y = torch.pow(x, 2)     # y = x**2

# 一阶导数
grad_1 = torch.autograd.grad(y, x, create_graph=True)   # grad_1 = dy/dx = 2x = 2 * 3 = 6
print(grad_1)

# 二阶导数
grad_2 = torch.autograd.grad(grad_1[0], x)              # grad_2 = d(dy/dx)/dx = d(2x)/dx = 2
print(grad_2)
(tensor([6.], grad_fn=<MulBackward0>),)
(tensor([2.]),)
torch.autograd.Function
有的时候,想要实现自己的一些操作(op),如特殊的数学函数、pytorch的module中没有的网络层,那就需要自己写一个Function,在Function中定义好forward的计算公式、backward的计算公式,然后将这些op组合到模型中,模型就可以用autograd完成梯度求取。
这个概念还是很抽象,平时用得不多,但是自己想要自定义网络时,常常需要自己写op,那么它就很好用了,为了让大家掌握自定义op——Function的写法,特地从多处收集了四个案例,大家多运行代码体会Function如何写。
案例1: exp
案例1:来自 https://pytorch.org/docs/stable/autograd.html#function
假设需要一个计算指数的功能,并且能组合到模型中,实现autograd,那么可以这样实现
第一步:继承Function
第二步:实现forward
第三步:实现backward
注意事项:
forward和backward函数第一个参数为ctx,它的作用类似于类函数的self一样,更详细解释可参考如下: In the forward pass we receive a Tensor containing the input and return a Tensor containing the output. ctx is a context object that can be used to stash information for backward computation. You can cache arbitrary objects for use in the backward pass using the ctx.save_for_backward method.
backward函数返回的参数个数与forward的输入参数个数相同, 即,传入该op的参数,都需要给它们计算对应的梯度。
import torch
from torch.autograd.function import Function

class Exp(Function):
    @staticmethod
    def forward(ctx, i):

        # ============== step1: 函数功能实现 ==============
        result = i.exp()
        # ============== step1: 函数功能实现 ==============

        # ============== step2: 结果保存,用于反向传播 ==============
        ctx.save_for_backward(result)
        # ============== step2: 结果保存,用于反向传播 ==============

        return result
    @staticmethod
    def backward(ctx, grad_output):

        # ============== step1: 取出结果,用于反向传播 ==============
        result, = ctx.saved_tensors
        # ============== step1: 取出结果,用于反向传播 ==============


        # ============== step2: 反向传播公式实现 ==============
        grad_results = grad_output * result
        # ============== step2: 反向传播公式实现 ==============


        return grad_results

x = torch.tensor([1.], requires_grad=True)
y = Exp.apply(x)                          # 需要使用apply方法调用自定义autograd function
print(y)                                  #  y = e^x = e^1 = 2.7183
y.backward()
print(x.grad)                           # 反传梯度,  x.grad = dy/dx = e^x = e^1  = 2.7183

# 关于本例子更详细解释,推荐阅读 https://zhuanlan.zhihu.com/p/321449610
tensor([2.7183], grad_fn=<ExpBackward>)
tensor([2.7183])
从代码里可以看到,y这个张量的 grad_fn 是 ExpBackward,正是我们自己实现的函数,这表明当y求梯度时,会调用ExpBackward这个函数进行计算
这也是张量的grad_fn的作用所在
案例2:为梯度乘以一定系数 Gradcoeff
案例2来自: https://zhuanlan.zhihu.com/p/321449610
功能是反向传梯度时乘以一个自定义系数
class GradCoeff(Function):

    @staticmethod
    def forward(ctx, x, coeff):

        # ============== step1: 函数功能实现 ==============
        ctx.coeff = coeff   # 将coeff存为ctx的成员变量
        x.view_as(x)
        # ============== step1: 函数功能实现 ==============
        return x

    @staticmethod
    def backward(ctx, grad_output):
        return ctx.coeff * grad_output, None    # backward的输出个数,应与forward的输入个数相同,此处coeff不需要梯度,因此返回None

# 尝试使用
x = torch.tensor([2.], requires_grad=True)
ret = GradCoeff.apply(x, -0.1)                  # 前向需要同时提供x及coeff,设置coeff为-0.1
ret = ret ** 2
print(ret)                                      # 注意看: ret.grad_fn
ret.backward()
print(x.grad)
tensor([4.], grad_fn=<PowBackward0>)
tensor([-0.4000])
在这里需要注意 backward函数返回的参数个数与forward的输入参数个数相同
即,传入该op的参数,都需要给它们计算对应的梯度。
案例3:勒让德多项式
案例来自:https://github.com/excelkks/blog
假设多项式为:
时,用两步替代该过程
import torch
import math
from torch.autograd.function import Function

class LegendrePolynomial3(Function):
    @staticmethod
    def forward(ctx, x):
        """
        In the forward pass we receive a Tensor containing the input and return
        a Tensor containing the output. ctx is a context object that can be used
        to stash information for backward computation. You can cache arbitrary
        objects for use in the backward pass using the ctx.save_for_backward method.
        """
        y = 0.5 * (5 * x ** 3 - 3 * x)
        ctx.save_for_backward(x)
        return y

    @staticmethod
    def backward(ctx, grad_output):
        """
        In the backward pass we receive a Tensor containing the gradient of the loss
        with respect to the output, and we need to compute the gradient of the loss
        with respect to the input.
        """
        ret, = ctx.saved_tensors
        return grad_output * 1.5 * (5 * ret ** 2 - 1)

a, b, c, d = 1, 2, 1, 2
x = 1
P3 = LegendrePolynomial3.apply
y_pred = a + b * P3(c + d * x)
print(y_pred)
127.0
案例4:手动实现2D卷积
案例来自:https://pytorch.org/tutorials/intermediate/custom_function_conv_bn_tutorial.html
案例本是卷积与BN的融合实现,此处仅观察Function的使用,更详细的内容,十分推荐阅读原文章
下面看如何实现conv_2d的
import torch
from torch.autograd.function import once_differentiable
import torch.nn.functional as F


def convolution_backward(grad_out, X, weight):
    """
    将反向传播功能用函数包装起来,返回的参数个数与forward接收的参数个数保持一致,为2个
    """
    grad_input = F.conv2d(X.transpose(0, 1), grad_out.transpose(0, 1)).transpose(0, 1)
    grad_X = F.conv_transpose2d(grad_out, weight)
    return grad_X, grad_input

class MyConv2D(torch.autograd.Function):
    @staticmethod
    def forward(ctx, X, weight):
        ctx.save_for_backward(X, weight)

        # ============== step1: 函数功能实现 ==============
        ret = F.conv2d(X, weight)
        # ============== step1: 函数功能实现 ==============
        return ret

    @staticmethod
    def backward(ctx, grad_out):
        X, weight = ctx.saved_tensors
        return convolution_backward(grad_out, X, weight)
weight = torch.rand(5, 3, 3, 3, requires_grad=True, dtype=torch.double)
X = torch.rand(10, 3, 7, 7, requires_grad=True, dtype=torch.double)
# gradcheck 会检查你实现的自定义操作的前向传播 (forward) 和反向传播 (backward) 方法是否正确计算了梯度。
# 如果返回 True,则表示梯度检查通过,即自定义操作的梯度计算与数值近似梯度之间的一致性在允许的误差范围内;
# 如果返回 False,则说明存在不匹配,需要检查和修正自定义操作的反向传播逻辑。
print("梯度检查: ", torch.autograd.gradcheck(MyConv2D.apply, (X, weight))) # gradcheck 功能请自行了解,通常写完Function会用它检查一下
y = MyConv2D.apply(X, weight)
label = torch.randn_like(y)
loss = F.mse_loss(y, label)

print("反向传播前,weight.grad: ", weight.grad)
loss.backward()
print("反向传播后,weight.grad: ", weight.grad)
梯度检查:  True
反向传播前,weight.grad:  None
反向传播后,weight.grad:  tensor([[[[1.3423, 1.3445, 1.3271],
          [1.3008, 1.3262, 1.2493],
          [1.2969, 1.3269, 1.2369]],
......
          [[1.2302, 1.2134, 1.2619],
          [1.2397, 1.2048, 1.2447],
          [1.2419, 1.2548, 1.2647]]]], dtype=torch.float64)
autograd相关的知识点
autograd使用过程中还有很多需要注意的地方,在这里做个小汇总。
- 知识点一:梯度不会自动清零
- 知识点二: 依赖于叶子结点的结点,requires_grad默认为True
- 知识点三: 叶子结点不可执行in-place
- 知识点四: detach 的作用
- 知识点五: with torch.no_grad()的作用
知识点一:梯度不会自动清零
import torch
w = torch.tensor([1.], requires_grad=True)
x = torch.tensor([2.], requires_grad=True)

for i in range(4):
    a = torch.add(w, x)
    b = torch.add(w, 1)
    y = torch.mul(a, b)

    y.backward()
    print(w.grad)  # 梯度不会自动清零,数据会累加, 通常需要采用 optimizer.zero_grad() 完成对参数的梯度清零

#     w.grad.zero_()
tensor([5.])
tensor([10.])
tensor([15.])
tensor([20.])
知识点二:依赖于叶子结点的结点,requires_grad默认为True
结点的运算依赖于叶子结点的话,它一定是要计算梯度的,因为叶子结点梯度的计算是从后向前传播的,因此与其相关的结点均需要计算梯度,这点还是很好理解的。
import torch
w = torch.tensor([1.], requires_grad=True)  #
x = torch.tensor([2.], requires_grad=True)

a = torch.add(w, x)
b = torch.add(w, 1)
y = torch.mul(a, b)

print(a.requires_grad, b.requires_grad, y.requires_grad)
print(a.is_leaf, b.is_leaf, y.is_leaf)
True True True
False False False
知识点三:叶子张量不可以执行in-place操作
叶子结点不可执行in-place,因为计算图的backward过程都依赖于叶子结点的计算,可以回顾计算图当中的例子,所有的偏微分计算所需要用到的数据都是基于w和x(叶子结点),因此叶子结点不允许in-place操作。
a = torch.ones((1, ))
print(id(a), a)

a = a + torch.ones((1, ))
print(id(a), a)

a += torch.ones((1, ))
print(id(a), a)
2361561191752 tensor([1.])
2362180999432 tensor([2.])
2362180999432 tensor([3.])
w = torch.tensor([1.], requires_grad=True)
x = torch.tensor([2.], requires_grad=True)

a = torch.add(w, x)
b = torch.add(w, 1)
y = torch.mul(a, b)

w.add_(1)

y.backward()
---------------------------------------------------------------------------

RuntimeError                              Traceback (most recent call last)

<ipython-input-41-7e2ec3c17fc3> in <module>
      6 y = torch.mul(a, b)
      7
----> 8 w.add_(1)
      9
     10 y.backward()


RuntimeError: a leaf Variable that requires grad is being used in an in-place operation.
知识点四:detach 的作用
通过以上知识,我们知道计算图中的张量是不能随便修改的,否则会造成计算图的backward计算错误,那有没有其他方法能修改呢?当然有,那就是detach()
detach的作用是:从计算图中剥离出“数据”,并以一个新张量的形式返回,并且新张量与旧张量共享数据,简单的可理解为做了一个别名。 请看下例的w,detach后对w_detach修改数据,w同步地被改为了999
w = torch.tensor([1.], requires_grad=True)
x = torch.tensor([2.], requires_grad=True)

a = torch.add(w, x)
b = torch.add(w, 1)
y = torch.mul(a, b)

y.backward()

w_detach = w.detach()
w_detach.data[0] = 999
print(w)
tensor([999.], requires_grad=True)
知识点五:with torch.no_grad()的作用
autograd自动构建计算图过程中会保存一系列中间变量,以便于backward的计算,这就必然需要花费额外的内存和时间。
而并不是所有情况下都需要backward,例如推理的时候,因此可以采用上下文管理器——torch.no_grad()来管理上下文,让pytorch不记录相应的变量,以加快速度和节省空间。
详见:https://pytorch.org/docs/stable/generated/torch.no_grad.html?highlight=no_grad#torch.no_grad
小结
本章终于结束,本章目的是为大家介绍pytorch的核心模块,包括pytorch代码库结构,以便于今后阅读源码,知道从哪里找代码;包括第一个分类模型训练,便于大家理解模型训练过程;包括核心数据结构——张量,便于理解整个pytorch的数据;包括计算图与autograd,便于大家熟悉自动微分的过程及自定义op的方法。
下一章将通过借助covid-19任务,详细介绍pytorch的数据读取机制,以及各种数据形式的读取,包括csv形式、txt形式、杂乱文件夹形式等一切关于数据读取、加载、操作的模块都将涉及。
小记:动笔一个多月,才写了两章,尤其autograd和tensor写了大半个月,希望后面能有更多时间精力早日完成,加油!2022年1月18日